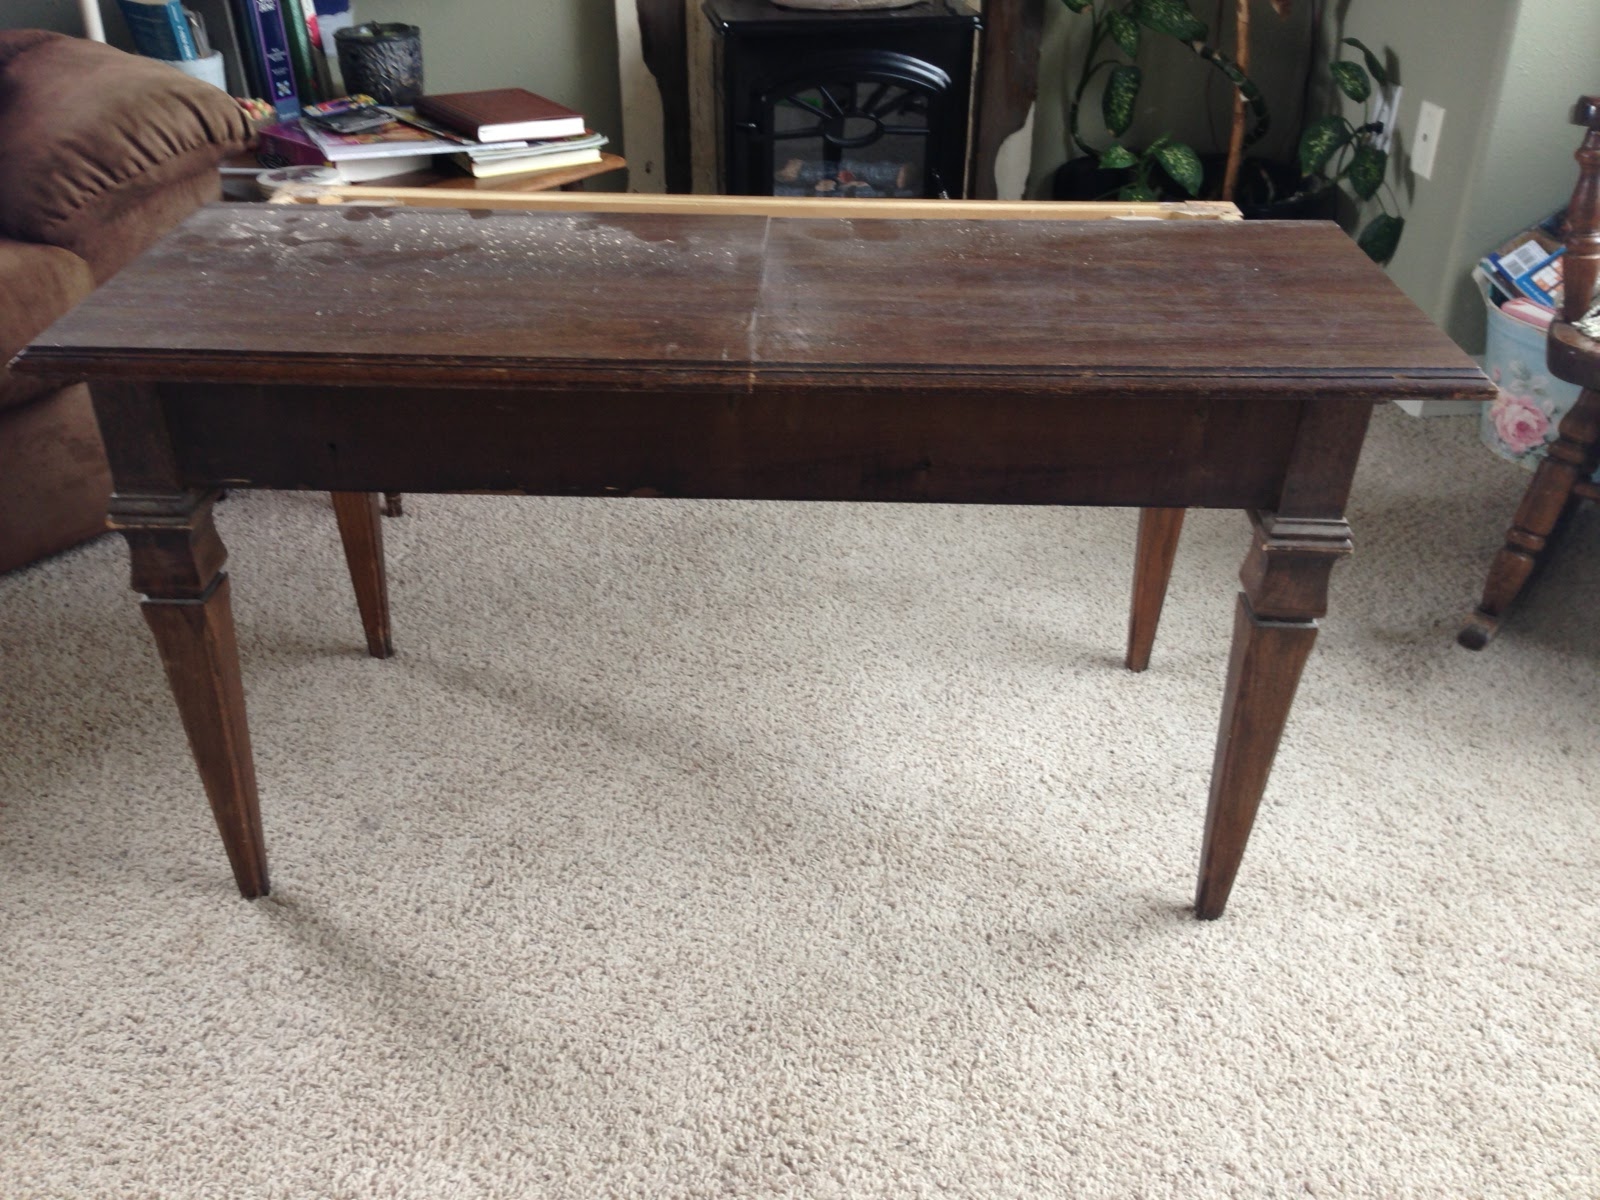
The table looked like a coffee table with a partial back on it. My best guess is that it was previously used as a side table that stood against a wall. It had beautiful square details on the face of it and it was structurally sound; a well-built piece of furniture. But I wasn't in the market for a side table. The only piece of furniture I have been looking for is a fireplace mantel, but have only managed to find those out of my price range...
But the longer I stared at this table (and yes, I even got down on the floor to view it at eye level!) the more it began to look more and more like the little mantel I had imagined hanging on my living room wall. Cam, not really able to picture what I had planned but I think intrigued by what I said I envisioned, went with it. We brought it home, and with my mom lending ideas and an occasional hand, we went to work!
We took this piece of furniture:

And turned it into this:


I'm totally thrilled with the end result!! I love it! The best part, aside from the fact we made it ourselves, Cam is really enjoying it too! Awesome!
This project wasn't very difficult but it was a little time consuming. All-in-all though, it was well worth every moment!
This is what we did:
 First step was to disassemble the table and cut it down to the size I wanted. The table top was too wide and too long for my preference so I knew I would need to cut it down, as well as make it a bit more narrow, to fit on the base without as much of a side overhang. I measured and decided how wide I wanted the top and we ripped the board lengthwise on a table saw. We also cut the board in half widthwise, removing just enough to make it narrower when the two halves were put back together.

(You can kind of see the back of the table when we placed the cut-down top back on)
Now that the top was of the dimensions I specified, I had to cut the frame to fit. I reattached the top piece to the frame using the screws we removed at the beginning, just making sure to put them where I wanted this time (allowing the overhang on the front and the sides to appear more 'mantel-like' in my opinion). Using a simple handsaw, I carefully cut the frame at the width of new table top.

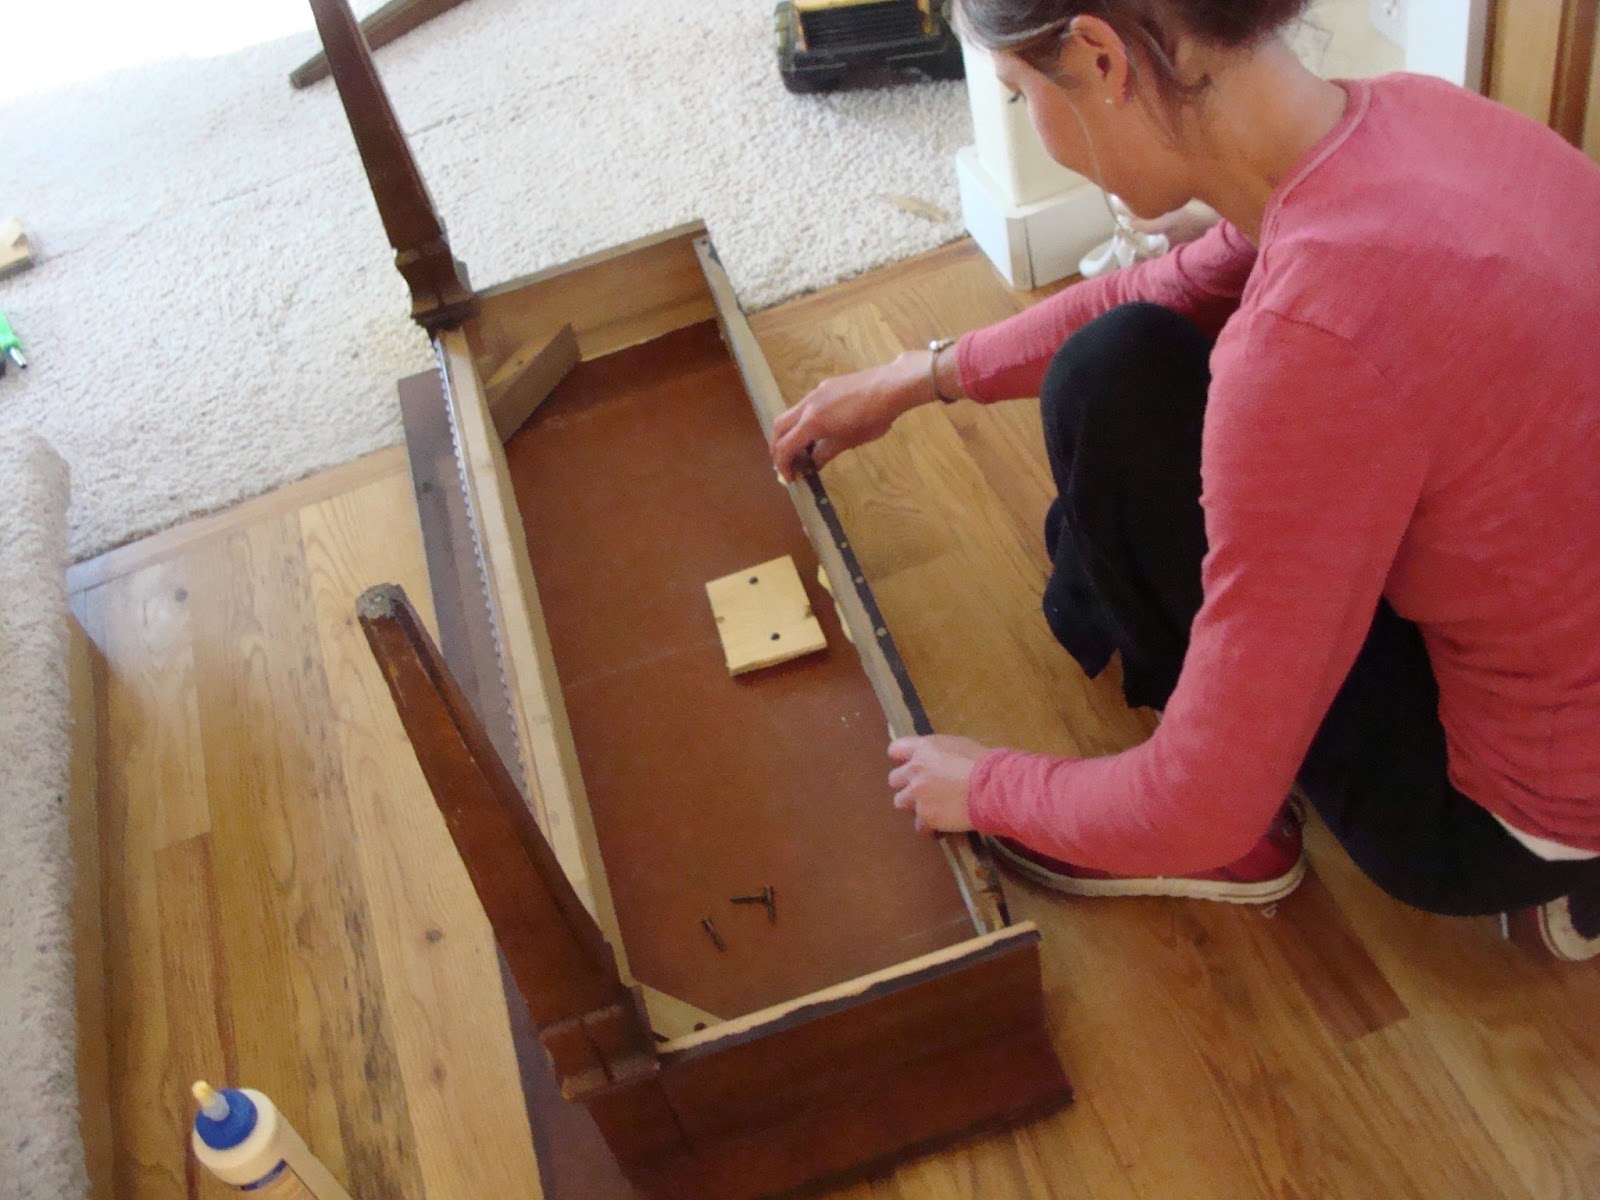 I then had to create a back brace. This brace was not only to supply stability and more support for the two pieced top, but to also allow me a place to securely attach it to the wall. This was easy. I used the back cross brace from the portion of the frame I just cut off, and fastened it to the top using wood glue and two more screws.
Now that the basic structure was complete, I needed to make the height right! For this, I removed the two back legs (the ones cut off) and added them to the front two, creating two long legs. Since I was attaching two narrow ends together, I needed a secure way to fasten them. The easiest way I found was to drill a hole in each of the ends that were going to be attached, and glue a dowel into one, leaving about an inch exposed at the top. Filling the hole I drilled into the second leg, the one being attached, I simply placed the dowel in the hole and tapped it into place. I did this for both sides.


With the legs complete and somewhat dry, I carefully attached it into two studs on the wall...

So far, so good! It was stable and cute! But we needed some sort of baking to make it appear more like a fireplace. I visited our local Habitat for Humanity Resale store and found a piece of faux stone Formica. A huge sheet was less than $7, so I brought it home!

Using a zacto knife, I carefully cut it down to size and attached it to an old wooden frame with liquid nails. I followed the directions for this adhesive, and when it was completely cured, I screwed the frame into place...at the back of my little fireplace!
The most time consuming portion of this project would have to be the crackle paint. I did a little research on how to accomplish this finish without spending an arm and a leg on the crackle medium, and came across a brilliant technique! It was so simple and really REALLY inexpensive; I was so eager to give it a go!! As you can see, it turned out really well and I am extremely pleased with the finish!

(I will cover how to do this in tomorrows post...so stay tuned!)
Once the paint had dried, and the polycrilic coat was cured, I put my fireplace heater underneath my new mantel. It's not quite the real-deal but I sure am enjoying it! It adds a rustic cottage-ness that I was so hoping for!
Enjoy and dream big!
very cool jen! you are so creative!
ReplyDeleteThanks! It's a lot of fun to try something new...got anything you are in need of and want help doing? :)
DeleteWow, what a cool idea, and it looks awesome, too. It really goes to show that sometimes you have to put on your "think-outside-the-box" goggles when looking for something you need, then put in the work to make it so!
ReplyDeleteThat's oh-so-true! And it's so much fun to get in there and try to do it yourself, learning every step of the way! Thanks so much!
DeleteWay cool !!!!!
ReplyDeleteThanks Jacobs! You'll have to come by and see it :)
DeleteVery nice work. It does look old!
ReplyDelete